
Skylights transform dark spaces into vibrant living areas while reducing electricity costs by 10-20%, yet 68% of skylight decisions result in premature failures, water damage, or energy efficiency disasters costing Edmonton homeowners $5,000-$15,000 in corrective work. This comprehensive guide provides evidence-based frameworks for choosing between skylight installation and repair, understanding realistic timelines for both options, and navigating warranty complexities that determine long-term value and protection for your investment.
Table of Contents:
- The Problem: Why Skylight Projects Fail at Alarming Rates
- What to Consider: Technical Evaluation and Performance Metrics
- How to Choose: Decision Framework and Implementation Timeline
- Roe Roofing’s Skylight Installation and Repair Approach
- Frequently Asked Questions
The Problem: Why Skylight Projects Fail at Alarming Rates
The Hidden Complexity of Skylight Systems
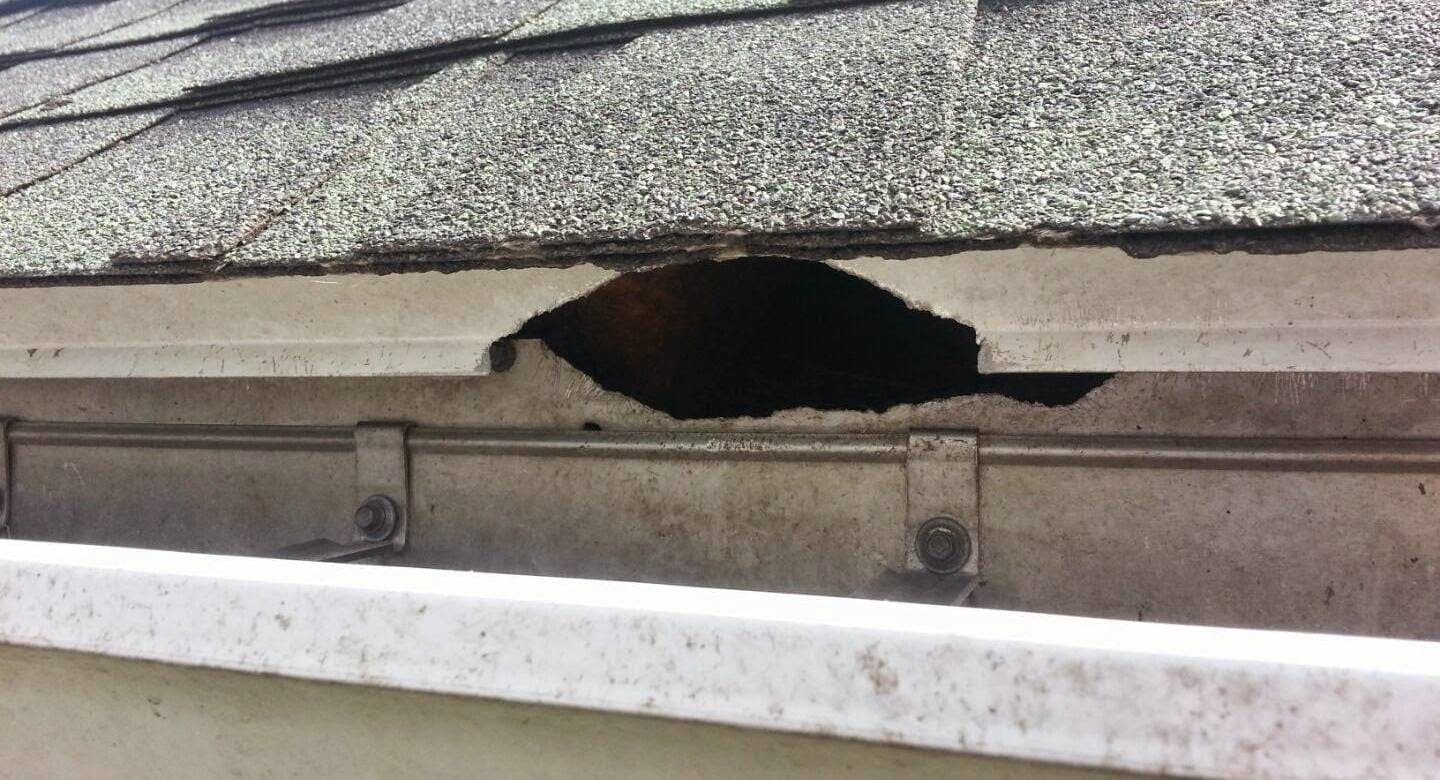
Skylights represent the most complex roof penetration, combining multiple building science challenges that standard roofing doesn’t address. Recent building science research reveals that skylights create thermal bridges averaging 15°C temperature differential between frame and surrounding roof deck, generating condensation patterns that mimic leaks while accelerating material deterioration. This complexity transforms simple installations into engineering challenges requiring expertise most contractors lack.
The integration requirements multiply failure opportunities exponentially. Skylights must manage water drainage, air sealing, vapor barriers, insulation continuity, and structural loads simultaneously. Each system requires perfect execution, as single failures cascade into comprehensive problems. Water infiltration damages insulation, reducing thermal performance by 90%. Air leaks create condensation that rots framing within 24 months. Vapor barrier discontinuities allow moisture migration that fosters mold growth throughout attic spaces.
Skylight system failure statistics in Edmonton:
- Installation defects causing problems: 45% within 2 years
- Condensation issues misdiagnosed as leaks: 30% of service calls
- Flashing integration failures: 25% of all skylight leaks
- Thermal movement damage: 15% of structural failures
- Code compliance violations: 40% of installations
Modern skylight technology compounds installation challenges through increased complexity. Triple-pane units weigh 40% more than older double-pane versions, requiring structural evaluation often skipped. Low-E coatings and gas fills improve efficiency but create thermal stress patterns that standard installations don’t accommodate. Motorized opening mechanisms introduce electrical components vulnerable to moisture damage. Smart home integration adds control systems that fail when water infiltrates.
The Contractor Competency Gap
The skylight industry suffers from systematic skill deficiencies that guarantee problems for unsuspecting homeowners. General roofing contractors typically lack understanding of skylight-specific requirements, treating them as oversized roof vents rather than complex building envelope penetrations. Window installers understand glazing but not roofing integration. This competency gap leaves homeowners vulnerable to contractors learning through experimentation on their homes.
Training and Certification Deficiencies:
Manufacturer certification programs exist but remain voluntary, with only 15% of installers completing training. These programs focus on product features rather than building science principles critical for successful integration. The ventilation requirements for skylight wells receive minimal coverage despite being crucial for condensation prevention. Structural evaluation methods necessary for retrofit installations get glossed over in favor of sales techniques.
Installation crews often consist of general laborers supervised by marginally trained leads. The complexity of skylight installation demands skilled tradespeople understanding carpentry, roofing, insulation, and finishing work. This skill combination rarely exists in single contractors, leading to subcontracted work with coordination failures. Communication gaps between trades create integration errors that manifest as chronic problems.
Industry skill gaps affecting quality:
- Building envelope understanding: 70% lack formal training
- Condensation management knowledge: 80% cannot explain mechanisms
- Structural assessment capability: 60% skip load calculations
- Code requirement awareness: 45% unfamiliar with current standards
- Warranty term comprehension: 55% misrepresent coverage
Economic Pressures Compromising Quality:
Competitive bidding for skylight projects creates impossible margins for proper installation. Accurate pricing requires site evaluation, structural analysis, and detailed planning consuming 4-6 hours before generating quotes. Contractors skip these steps, providing estimates based on generic assumptions that prove inadequate during installation. Change orders and corner-cutting compensate for underpricing, compromising installation quality.
The insurance standards classify skylight damage as high-risk, leading to coverage restrictions and claim denials that contractors don’t discuss. Homeowners discover these limitations only after problems develop, finding themselves responsible for damages contractors’ insurance won’t cover. Professional liability insurance covering design defects remains rare among residential contractors, leaving homeowners exposed to engineering failures.
Price pressure impacts throughout projects:
- Site evaluation: Skipped to reduce quote costs
- Structural reinforcement: Omitted despite necessity
- Quality materials: Substituted with inferior alternatives
- Skilled labor: Replaced with cheaper workers
- Inspection and testing: Eliminated to save time
The Energy Efficiency Deception
Marketing claims about skylight energy savings obscure the complex reality of thermal performance that often increases heating and cooling costs rather than reducing them. Manufacturers advertise U-values and Solar Heat Gain Coefficients (SHGC) measured under laboratory conditions that don’t reflect real-world installation impacts. The energy efficiency standards acknowledge that installed performance typically degrades 20-40% from rated values due to thermal bridging and air leakage.
Summer Heat Gain Catastrophes:
South and west-facing skylights without proper shading can increase cooling loads by 40% during Edmonton’s increasingly hot summers. The greenhouse effect created by skylights traps heat that mechanical systems struggle to remove. Surface temperatures on skylight glass reach 60°C, radiating heat into living spaces long after sunset. Attempts to block heat with blinds often prove ineffective, as heat trapped between blinds and glass still transfers into rooms.
The angular dependence of solar gain means skylights admit 40% more heat than vertical windows of equal size during summer when sun angles are high. This occurs precisely when cooling demand peaks, overwhelming air conditioning systems sized for standard window loads. Homeowners report temperature increases of 5-8°C in rooms with skylights, creating uncomfortable hot spots that force system rebalancing.
Summer heat gain factors:
- Direct solar radiation: 800-1000 watts per square meter
- Greenhouse effect multiplier: 1.3-1.5x
- Night sky radiation loss: Minimal during summer
- Ventilation heat removal: Limited by stack effect
- Shading effectiveness: 30-50% reduction maximum
Winter Heat Loss Reality:
Winter performance proves equally problematic despite marketing emphasis on natural light reducing heating costs. Skylights lose heat at rates 2-3 times higher than insulated roof sections they replace. The upward orientation maximizes radiative heat loss to cold night skies, a phenomenon vertical windows avoid. Convection currents at skylight surfaces create drafts that discomfort occupants regardless of room temperature.
Condensation forms on skylight surfaces when interior humidity meets cold glass, creating water damage indistinguishable from leaks. This moisture accumulation damages finishes, promotes mold growth, and necessitates constant maintenance. The weather impact studies document that Edmonton’s extreme temperature variations create condensation conditions 40% of winter days, even with high-performance glazing.
The Repair Versus Replace Dilemma
Existing skylight problems create complex decision scenarios where repair costs approach replacement prices without providing equivalent value. The average skylight repair costs $1,500-3,000, while replacement ranges from $3,000-6,000, creating a narrow price differential that complicates decision-making. Understanding failure modes and repair limitations enables informed choices avoiding costly mistakes.
Cascading Failure Mechanisms:
Skylight deterioration follows predictable patterns where minor issues escalate into comprehensive failures. Seal degradation begins at corners where thermal stress concentrates, creating small gaps that admit water. This moisture infiltrates insulated glass units, causing fogging that reduces light transmission by 30-50%. Attempted seal repairs provide temporary clarity but fail within 12-18 months as underlying stress patterns persist.
Frame deterioration accelerates once water penetrates protective coatings. Aluminum frames develop corrosion that weakens structural integrity while creating expansion that stresses glass. Vinyl frames warp from thermal cycling, breaking seals and creating air gaps. Wood frames rot from moisture exposure, requiring reconstruction that approaches replacement cost. These frame failures cascade into glass stress that causes cracking.
Failure progression timeline:
- Year 1-3: Cosmetic deterioration begins
- Year 4-6: Seal integrity compromised
- Year 7-10: Fogging and minor leaks
- Year 11-15: Frame deterioration visible
- Year 16-20: Structural compromise requiring action
Repair Limitation Realities:
Skylight repairs face inherent limitations that reduce effectiveness compared to other building components. Glass seal repairs cannot restore original thermal performance, achieving only 60% of new unit efficiency. Frame repairs using fillers and sealants provide temporary solutions but don’t address structural weakening. Flashing repairs without addressing underlying frame issues guarantee repeated failures.
The integrated nature of modern skylights prevents component replacement. Older skylights with replaceable glazing panels have become obsolete, replaced by sealed units requiring complete replacement when glass fails. Attempts to retrofit new glass into old frames create compatibility issues that void warranties and compromise performance. Motor replacements for operating skylights often require control system updates that cascade into comprehensive upgrades.
What to Consider: Technical Evaluation and Performance Metrics
Structural Load Assessment Requirements
Skylight installation or replacement demands thorough structural evaluation that many contractors skip, leading to catastrophic failures when loads exceed capacity. The concentrated weight of modern triple-pane skylights with operating mechanisms can reach 200 pounds, creating point loads that standard residential framing wasn’t designed to support. The building codes require engineering evaluation for openings exceeding 4 square feet, yet enforcement remains sporadic.
Existing Framing Evaluation:
Retrofit skylight installations require assessment of current structural capacity before proceeding. Rafter or truss spacing determines maximum opening size without reinforcement. Standard 24-inch on-center framing limits skylight width to 22.5 inches unless headers and doubled rafters provide support. Older homes with 2×6 rafters lack capacity for large skylights without significant reinforcement that adds $1,500-3,000 to project costs.
Visual inspection identifies obvious deficiencies like cracked rafters, sagging roof planes, or previous modifications that compromise structure. However, hidden problems including inadequate nailing patterns, deteriorated connectors, or undersized members require invasive investigation. Professional evaluation using calculations based on span tables and load requirements provides confidence that structures support planned skylights safely.
Load factors requiring calculation:
- Dead load: Skylight weight plus roofing materials
- Live load: Snow accumulation potential
- Wind load: Uplift forces on skylight dome
- Seismic load: Lateral forces during earthquakes
- Dynamic load: Operating mechanism forces
Snow Load Accumulation Patterns:
Skylights create snow accumulation patterns that multiply structural loads beyond uniform calculations. Drift formation around raised curbs can triple localized snow loads, creating forces that standard framing cannot support. Edmonton’s average snow load of 1.9 kPa increases to 5.7 kPa in skylight drift zones, exceeding design capacity for unreinforced openings.
The thermal properties of skylights affect snow behavior differently than surrounding roofs. Heat loss through skylights creates melt patterns that form ice dams below units, adding weight while preventing drainage. Avalanche risks develop when accumulated snow suddenly releases, potentially damaging property or injuring people below. These dynamics require consideration during placement planning and structural design.
Reinforcement Strategies and Costs:
Structural reinforcement for skylights follows established patterns depending on existing framing and desired opening size. Headers constructed from doubled or tripled lumber carry loads around openings to adjacent rafters. Simpson Strong-Tie connectors or equivalent provide positive connections resisting uplift forces. Sister rafters attached to existing members increase load capacity without complete reconstruction.
Engineered solutions using laminated veneer lumber (LVL) or parallel strand lumber (PSL) provide superior strength for large openings. These materials cost 50% more than dimensional lumber but enable spans impossible with traditional framing. Installation requires precision cutting and proper bearing points to achieve rated capacity. Professional installation ensures code compliance and warranty validity.
Reinforcement cost factors:
- Basic headers for small skylights: $300-500
- Doubled rafters for medium units: $500-1,000
- Engineered beams for large openings: $1,000-2,500
- Engineering consultation: $500-1,000
- Permit and inspection fees: $200-500
Condensation Management Systems
Condensation represents the primary failure mode for skylights in Edmonton’s climate, where interior humidity meets cold skylight surfaces 120+ days annually. Understanding condensation mechanisms enables selection of appropriate skylights and installation methods that minimize problems. The ventilation requirements specify airflow rates necessary for moisture management, yet most installations fail to achieve adequate ventilation.
Glazing Technology Comparison:
Double-pane skylights with standard air fills provide basic thermal resistance but suffer from edge condensation when temperatures drop below -20°C. The aluminum spacers used in economical units create thermal bridges that guarantee condensation formation. Low-E coatings reduce radiative heat loss but don’t eliminate surface condensation during extreme cold. These units suit protected applications with managed interior humidity.
Triple-pane skylights with argon or krypton gas fills achieve superior thermal performance that reduces condensation potential. Warm-edge spacers using silicone foam or thermoplastic materials minimize thermal bridging at glass edges where condensation typically initiates. Multiple Low-E coatings optimize performance for heating-dominated climates like Edmonton. The 40% weight increase requires structural evaluation but provides 60% better thermal performance.
Glazing performance metrics:
- Double-pane U-value: 0.45-0.55 (R-2.0 to R-2.2)
- Triple-pane U-value: 0.25-0.35 (R-2.9 to R-4.0)
- Condensation resistance: 45 (double) vs 65 (triple)
- Solar heat gain coefficient: 0.25-0.55 variable
- Visible light transmission: 40-70% depending on coatings
Ventilation Design Principles:
Proper ventilation around skylights prevents moisture accumulation that causes mold, rot, and ice dam formation. The skylight well requires air circulation that removes moisture-laden air before condensation occurs. Passive ventilation using convection currents provides continuous airflow without mechanical systems. Soffit vents at well bottoms introduce cool, dry air while upper vents exhaust warm, moist air.
Mechanical ventilation becomes necessary for large skylights or high-humidity environments. Exhaust fans activated by humidity sensors remove moisture before problematic accumulation. Heat recovery ventilators (HRVs) provide balanced ventilation while preserving thermal efficiency. Integration with whole-house ventilation systems ensures comprehensive moisture management. These systems add $1,000-3,000 to installation costs but prevent thousands in moisture damage.
Vapor Barrier Integration:
Vapor barrier continuity around skylights prevents moisture migration into surrounding assemblies where condensation causes hidden damage. The warm-side vapor barrier must connect seamlessly with skylight frames using compatible tapes or sealants. Penetrations for electrical or mechanical systems require careful sealing to maintain barrier integrity. Missing or compromised vapor barriers guarantee moisture problems regardless of glazing quality.
Installation sequences affect vapor barrier effectiveness. Barriers installed before skylight placement enable proper integration with frames. Retrofit installations require careful detailing to achieve continuity with existing barriers. Spray foam insulation provides combined air sealing and vapor control but requires professional application. These details determine whether installations succeed or create chronic moisture problems.
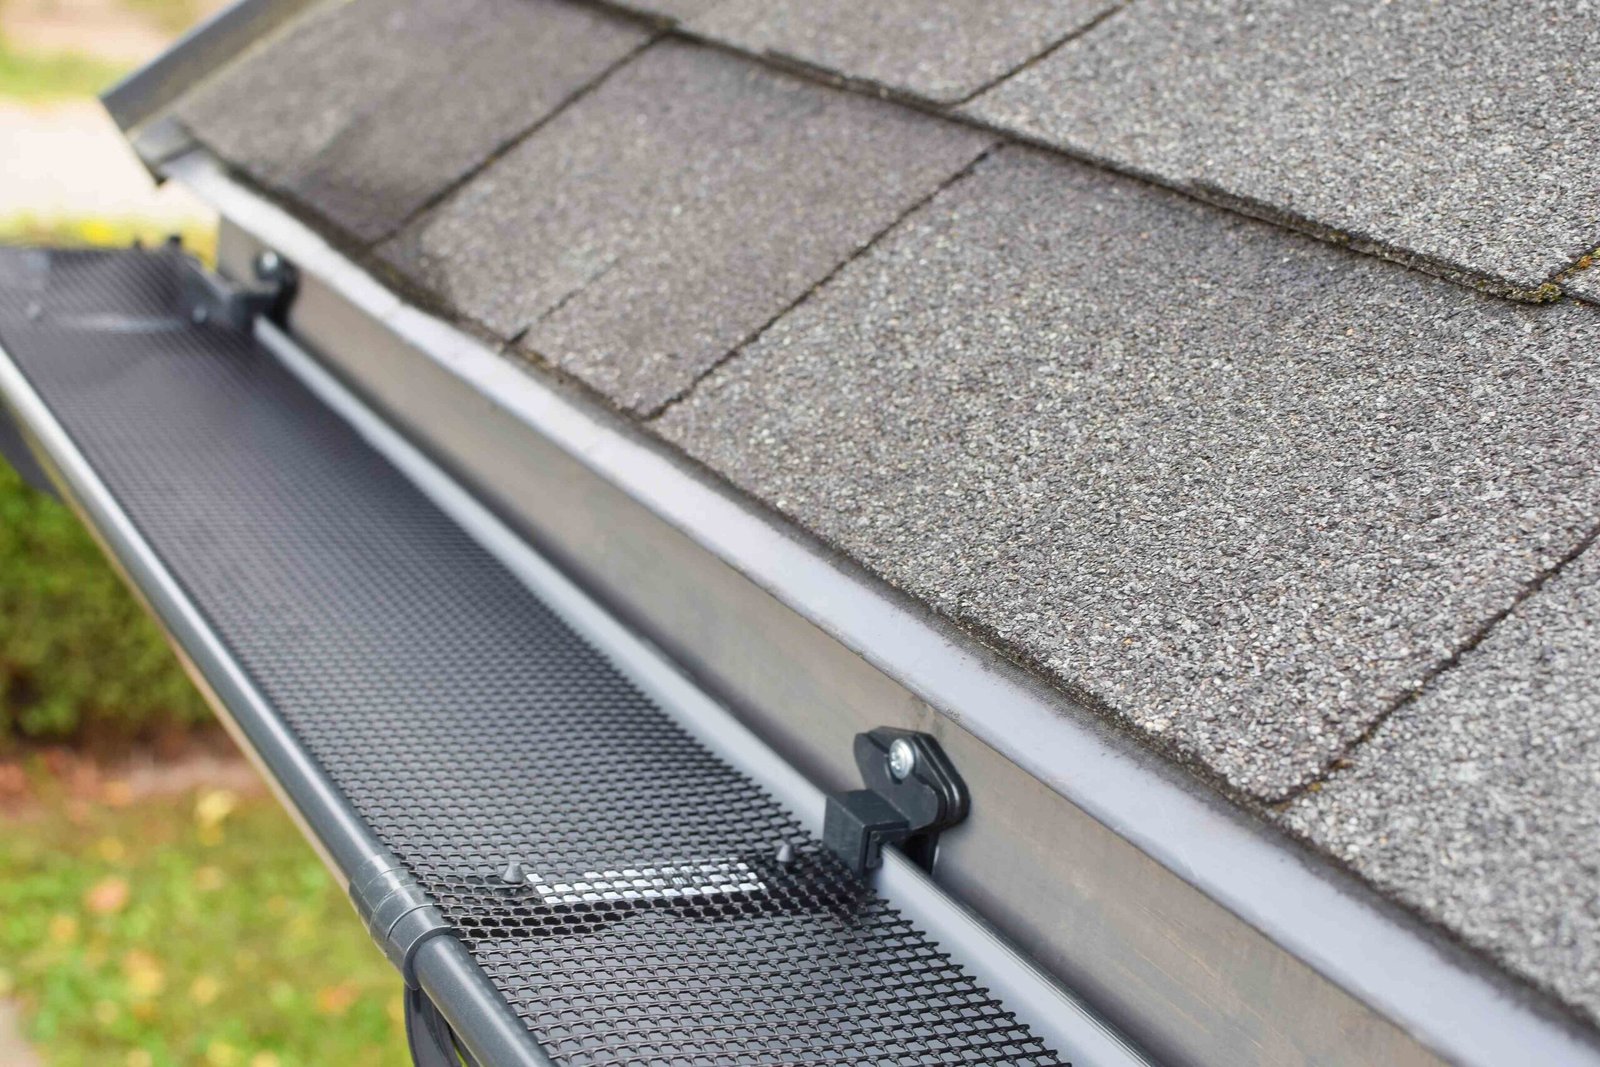
Flashing Integration Technologies
Flashing systems represent the critical water management component that determines skylight longevity and leak resistance. Modern integrated flashing systems surpass traditional step-flashing methods, providing superior protection against wind-driven rain and ice dam conditions common in Edmonton. Understanding flashing options and installation requirements enables informed product selection and quality verification.
Manufactured Flashing Kit Advantages:
Factory-engineered flashing kits designed for specific skylight models provide superior integration compared to field-fabricated flashings. These systems include precisely formed components that interlock, creating multiple drainage paths while maintaining aesthetic appeal. Sill pans with integrated end dams prevent water intrusion at vulnerable corners. Head flashings with proper slope shed water away from frames. Side flashings with kickout diverters direct water onto roof surfaces.
Material selection in manufactured kits optimizes durability and compatibility. Aluminum flashings with baked enamel finishes resist corrosion for 30+ years. EPDM gaskets provide flexible seals that accommodate thermal movement. Butyl adhesive strips create redundant water barriers. These materials work synergistically, providing protection exceeding individual component capabilities.
Manufactured kit components:
- Pre-formed sill pan with weep channels
- Interlocking side flashings with returns
- Head flashing with back dam
- Corner boots preventing gap formation
- Adhesive underlayment strips
Custom Flashing Fabrication Requirements:
Unusual roof configurations or non-standard skylights require custom flashing fabrication that demands skilled metalwork. Soldered copper flashings provide ultimate durability but require specialized skills rare among residential contractors. Lead-coated copper offers easier workability while maintaining longevity. Painted steel flashings cost less but require maintenance to prevent corrosion.
Field fabrication must address thermal movement that causes standard flashings to fail. Expansion joints at regular intervals prevent buckling that opens water paths. Hemmed edges provide rigidity while eliminating sharp surfaces. Proper pitch ensures positive drainage without ponding. These details separate professional installations from amateur attempts that leak within months.
Ice and Water Shield Integration:
Self-adhered ice and water shield membrane beneath flashings provides secondary protection when primary flashings develop leaks. This rubberized asphalt membrane seals around fasteners, creating waterproof barriers that protect deck substrates. High-temperature versions resist flowing in summer heat that affects standard products. Application extends minimum 6 inches beyond skylight openings, overlapping with field underlayment.
Critical installation details determine effectiveness. Primer application ensures adhesion to OSB or plywood decking. Overlaps follow shingle-style patterns preventing reverse laps that channel water incorrectly. Release paper removal immediately before flashing installation prevents contamination that compromises adhesion. These seemingly minor details determine whether backup protection functions when needed.
Energy Performance Optimization
Skylight energy performance extends beyond glazing specifications to include orientation, shading, and thermal mass considerations that dramatically affect heating and cooling loads. The energy efficiency standards provide calculation methods for skylight contributions to building energy use, revealing optimization strategies that transform energy liabilities into assets.
Orientation and Sizing Calculations:
North-facing skylights provide consistent, diffuse lighting ideal for art studios or workspaces requiring stable illumination without glare or heat gain. These orientations minimize cooling loads while maximizing winter solar gain when sun angles permit. The penalty comes from reduced total light levels, requiring larger skylights to achieve desired brightness. This orientation suits Edmonton’s climate, balancing light and thermal performance.
South-facing skylights maximize winter solar gain, providing passive heating that reduces energy costs. However, summer heat gain requires external shading or high-performance glazing with low SHGC values. Sizing calculations balance winter benefit against summer penalty, typically limiting south-facing skylights to 3-5% of floor area. Thermal mass in floors or walls stores heat for evening release, improving passive solar effectiveness.
Orientation impacts by season:
- North: Consistent light, minimal heat gain
- South: Maximum winter gain, summer overheating risk
- East: Morning light and heat, afternoon cooling
- West: Afternoon heat gain when cooling loads peak
- Horizontal: Maximum light but highest heat transfer
Dynamic Glazing Technologies:
Electrochromic glass that darkens on demand provides ultimate control over light and heat transmission. These “smart” skylights adjust tint levels automatically based on sensors or manual control, optimizing comfort and energy use. The technology adds $2,000-4,000 per skylight but eliminates needs for blinds while providing superior performance. Integration with home automation systems enables scheduling and remote control.
Thermochromic glazing changes tint based on temperature, automatically reducing solar gain as temperatures rise. This passive technology requires no power or controls, making it reliable and maintenance-free. The transition temperature can be specified during manufacturing to optimize for specific climates. Cost premiums of 50-70% over standard glazing limit adoption despite performance benefits.
Thermal Break Importance:
Frame thermal performance significantly impacts overall skylight efficiency, with aluminum frames conducting heat 1,000 times faster than wood or fiberglass alternatives. Thermal breaks using polyamide strips or poured polyurethane separate interior and exterior aluminum sections, reducing heat transfer by 50%. These improvements prevent frame condensation while improving comfort near skylights.
Installation thermal bridges often negate high-performance frame benefits. Direct frame contact with framing lumber creates heat transfer paths that bypass insulation. Proper installation includes thermal isolation using foam gaskets or spray foam that eliminates conductive paths. Insulation must contact frames completely, preventing convection currents that increase heat loss. These installation details determine whether rated performance translates to actual efficiency.
How to Choose: Decision Framework and Implementation Timeline
Repair Viability Assessment Matrix
Determining whether existing skylights merit repair versus replacement requires systematic evaluation of multiple factors that interact to affect long-term value. This assessment matrix provides objective criteria for making informed decisions based on condition, performance, and economic considerations.
Age and Warranty Status Evaluation:
Skylights under 10 years old with active warranties typically justify repairs unless catastrophic damage occurred. Warranty coverage for seal failures, leaks, or mechanical problems reduces repair costs while preserving initial investments. However, building codes updates might require upgrades during repairs that approach replacement costs. Documentation of warranty terms and installation dates proves critical for claim processing.
Skylights aged 10-20 years enter the decision zone where repair economics become questionable. Seals degrade predictably after 12-15 years, with repairs providing only temporary relief. Frame deterioration accelerates after protective coatings fail, making comprehensive restoration costly. Operating mechanisms wear out, with replacement parts becoming unavailable for discontinued models. Energy efficiency improvements in new skylights often justify replacement through operational savings.
Skylights over 20 years old rarely merit repair unless they’re high-quality units with replaceable components. Technology improvements make modern skylights 50% more efficient than 20-year-old units. Safety glass requirements in current codes might mandate replacement regardless of condition. Historical or architectural significance might justify restoration of unique skylights, though costs exceed replacement.
Decision factors by age:
- 0-5 years: Repair unless structural damage
- 5-10 years: Repair if warranty active
- 10-15 years: Evaluate case-by-case
- 15-20 years: Replace unless premium unit
- 20+ years: Replace except special circumstances
Performance Deficiency Analysis:
Condensation problems indicate fundamental performance inadequacies that repairs cannot resolve. Persistent fogging between glass panes signals seal failure requiring glass unit replacement that approaches total skylight replacement cost. Frame condensation suggests inadequate thermal breaks that retrofitting cannot address. Water pooling in frames indicates drainage failures that worsen over time.
Light transmission degradation from yellowing, hazing, or scratching reduces skylights’ primary benefit. Cleaning provides temporary improvement, but UV damage to plastics proves irreversible. Coating applications restore some clarity but last only 2-3 years. When light transmission drops below 50% of original levels, replacement becomes necessary to restore functionality.
Energy performance evaluation using thermal imaging reveals heat loss patterns that impact decisions. Edge losses exceeding center-of-glass values by 3x indicate failed warm-edge spacers. Frame surface temperatures below dewpoint guarantee condensation problems. Air leakage around frames shown by pressure testing indicates installation or deterioration issues. These performance metrics quantify problems that subjective assessment might minimize.
Cost-Benefit Calculation Framework:
Repair costs exceeding 50% of replacement price rarely prove economical when considering longevity differences. Professional assessment fees of $300-500 provide detailed condition reports and repair estimates. Complex repairs involving multiple trades quickly escalate beyond initial estimates. Temporary repairs that delay inevitable replacement waste money while problems compound.
Energy savings from high-efficiency replacement units offset higher initial costs. Annual heating and cooling savings of $200-400 per skylight accumulate significantly over 20+ year lifespans. Available rebates through energy efficiency programs reduce effective replacement costs by $500-1,000. Insurance premium reductions for impact-resistant skylights provide additional savings. Tax benefits for energy improvements further improve replacement economics.
Total cost of ownership comparison:
- Repair scenario: $2,000 repair + $300 annual energy loss + $500 maintenance = $10,000 over 10 years
- Replacement scenario: $5,000 replacement + $100 annual energy loss + $100 maintenance = $7,000 over 10 years
Installation Timeline and Seasonal Considerations
Skylight projects require careful scheduling to minimize weather exposure while ensuring optimal installation conditions. Understanding seasonal factors and realistic timelines enables proper planning that avoids rushed work or weather delays.
Optimal Installation Windows:
Late spring (May-June) provides ideal conditions for skylight installation in Edmonton. Temperatures between 10-25°C allow proper sealant curing without extreme thermal stress. Minimal precipitation reduces weather delays while providing adequate time before summer heat. Contractor availability improves after winter backlog completion. Material selection remains complete before summer shortages develop.
Early fall (September-October) offers another favorable window with stable weather and moderate temperatures. Completed installations receive testing through winter conditions while warranties remain fresh. Contractors provide competitive pricing to secure work before winter slowdown. However, shorter days reduce working hours, potentially extending project duration.
Seasonal installation factors:
- Spring: Optimal weather, competitive pricing
- Summer: Heat complications, contractor shortage
- Fall: Good weather, shorter days
- Winter: Weather delays, limited options
Project Duration Expectations:
Simple skylight replacements in existing openings require 1-2 days for professional crews. Day one involves interior protection, old skylight removal, and opening preparation. Structural evaluation confirms adequacy before proceeding. New skylight installation includes flashing integration and preliminary sealing. Day two completes exterior work, insulation installation, and interior finishing.
New skylight installations require 3-5 days for typical projects. Structural modifications consume the first day, including header installation and rafter reinforcement. Roofing removal and deck cutting create openings on day two. Skylight installation with complete flashing integration occurs day three. Interior framing and insulation require day four. Finishing work including drywall and painting extends into day five.
Complex projects involving multiple skylights or significant structural work extend to 1-2 weeks. Coordination between trades becomes critical for efficiency. Weather delays must be anticipated with contingency planning. Temporary weather protection prevents interior damage during extended projects. Final inspections and testing confirm proper installation before payment.
Weather Contingency Planning:
Edmonton’s unpredictable weather requires robust contingency planning for skylight projects. Temporary weather barriers must be available for sudden storms during installation. Professional contractors maintain emergency response capabilities for weather protection. Project contracts should address weather delays and protection responsibilities.
Winter installations remain possible but require special considerations. Heated enclosures protect work areas while allowing proper material installation. Sealants require specific cold-weather formulations that cure at low temperatures. Shortened daylight hours reduce productivity, extending project timelines. Snow removal adds time and cost to winter projects. These factors increase winter installation costs by 20-30%.
Warranty Navigation and Protection
Skylight warranties contain complex terms that significantly impact long-term value and protection. Understanding warranty structures, requirements, and limitations enables informed decisions while avoiding actions that void coverage.
Manufacturer Warranty Components:
Glass seal warranties typically provide 10-20 year coverage against fogging between panes. However, coverage often prorates after 5 years, reducing value over time. Labor costs for replacement rarely receive coverage, potentially costing $500-1,000 despite “free” replacement glass. Transferability to new homeowners requires notification and fees that sellers often overlook.
Frame warranties cover structural integrity and finish degradation for 10-20 years. Exclusions for “normal wear” create interpretation disputes when claims arise. Coastal or industrial environments void warranties despite Edmonton’s distance from such conditions. Modifications including painting void finish warranties immediately. Documentation requirements demand proof of professional installation for validity.
Operating mechanism warranties for venting skylights provide 5-10 year coverage on motors and controls. Electronic components receive shorter coverage than mechanical parts. Power surge damage typically falls under exclusions despite vulnerability. Water damage from any source voids electrical warranties. Replacement parts availability becomes problematic as models discontinue.
Warranty component breakdown:
- Glass seal: 10-20 years, prorated
- Frame structure: 10-20 years limited
- Frame finish: 5-10 years appearance
- Hardware: 5-10 years mechanical
- Electronics: 2-5 years operation
Installation Warranty Importance:
Contractor workmanship warranties prove equally important as manufacturer coverage, addressing installation-related failures that cause most problems. Quality contractors provide 5-10 year installation warranties covering labor and consequential damage. These warranties should be written, transferable, and backed by insurance or bonds. Contractors disappearing within 5 years make warranty enforcement impossible without protection.
Certification requirements affect warranty validity. Manufacturer-certified installers provide extended warranties combining product and installation coverage. The insurance standards recognize certified installations with better coverage terms. Documentation including photos and inspection reports supports warranty claims. Missing documentation creates claim denials despite obvious defects.
Warranty Preservation Requirements:
Annual maintenance requirements maintain warranty validity but receive minimal emphasis during sales. Professional inspections every 2-3 years document condition while identifying developing problems. Cleaning requirements using approved methods prevent damage that voids coverage. Prompt repair of minor issues prevents escalation that exceeds warranty coverage.
Documentation retention proves critical for warranty claims. Original purchase receipts, installation contracts, and warranty certificates require safe storage. Digital copies provide backup against loss while enabling easy transmission for claims. Maintenance records demonstrate compliance with warranty requirements. Photos document pre-existing conditions that affect coverage. This documentation burden falls entirely on homeowners despite minimal guidance from manufacturers.
Code Compliance and Permit Requirements
Building code requirements for skylights continue evolving, with recent updates significantly impacting installation requirements and costs. Understanding current codes and permit processes prevents costly corrections and legal complications.
Current Code Requirements:
The 2019 Alberta Building Code mandates tempered or laminated safety glass for skylights, eliminating cheaper annealed glass options. This requirement adds 20-30% to glass costs but prevents catastrophic failures that cause injuries. Existing skylights might be grandfathered until replacement triggers upgrade requirements. Emergency egress skylights in bedrooms must meet minimum opening dimensions for fire escape.
Energy codes require minimum thermal performance levels that eliminate single-pane or metal-frame skylights. The building codes specify maximum U-values of 2.80 W/m²·K, requiring double-pane minimum with thermal breaks. Prescriptive compliance paths limit skylight area to 2% of floor area without energy modeling. Performance paths allow larger areas with offsetting improvements elsewhere.
Structural codes address snow load accumulation around skylights that previous codes ignored. Drift loads must be calculated for skylights creating obstructions to snow movement. Curb heights minimize to reduce drift formation while maintaining water drainage. Headers and reinforcement must support calculated loads with safety factors. These requirements often trigger engineering reviews for larger skylights.
Code requirement categories:
- Safety glazing: Tempered or laminated glass
- Energy efficiency: Maximum U-2.80
- Structural: Snow drift load calculations
- Ventilation: Minimum airflow if operable
- Emergency egress: Minimum clear opening
Permit Process Navigation:
Permit requirements vary between municipalities, with Edmonton requiring permits for all skylight installations affecting structure. Simple replacements in existing openings might qualify for simplified permits. New installations require full building permits with plan reviews. Permit fees range from $150-500 depending on project scope and value.
Application requirements include detailed drawings showing structural modifications and flashing details. Engineer stamps become necessary for openings exceeding standard tables. Energy compliance calculations demonstrate code conformance. Contractor licenses and insurance verification protect homeowners. These requirements delay projects by 2-4 weeks while adding professional service costs.
Inspection sequences ensure code compliance at critical stages. Rough framing inspection verifies structural adequacy before closing walls. Insulation inspection confirms thermal barrier installation. Final inspection checks completed installation including safety features. Failed inspections require corrections and re-inspection, potentially delaying projects. Professional contractors familiar with inspection requirements minimize delays.
Roe Roofing’s Skylight Installation and Repair Approach
Comprehensive Structural Assessment
Roe Roofing begins every skylight project with thorough structural evaluation that exceeds industry standards, preventing the failures plaguing rushed installations. The company’s assessment protocol includes detailed load calculations based on actual conditions rather than generic assumptions. This engineering approach identifies necessary reinforcement before work begins, eliminating costly surprises during installation.
The evaluation process uses advanced tools including laser levels to detect roof plane deflection indicating marginal framing. Digital moisture meters identify water damage compromising structural integrity. Thermal imaging reveals insulation gaps affecting skylight well performance. This technology-driven assessment provides objective data supporting recommendations rather than subjective opinions.
Roe Roofing’s structural specialists understand the complex load paths created by skylight openings in various framing systems. Truss roofs require different approaches than rafter construction, with load redistribution affecting distant members. The company’s experience with Edmonton’s diverse housing stock enables accurate assessment of everything from 1950s bungalows to modern engineered structures. This expertise prevents the structural failures that result from treating all roofs identically.
Advanced Installation Methodologies
Roe Roofing employs installation techniques developed through thousands of successful skylight projects across Edmonton’s challenging climate. The company’s crews receive ongoing training on manufacturer updates and building science advances that improve installation quality. This commitment to education ensures installations incorporate latest best practices rather than outdated methods.
The installation process emphasizes critical details that determine long-term performance. Thermal breaks between skylights and framing prevent condensation-causing cold spots. Redundant water management using both integral flashings and secondary membranes provides insurance against future leaks. Air sealing using compatible tapes and sealants prevents energy-robbing drafts. These details require minimal additional time but dramatically improve outcomes.
Quality control checkpoints throughout installation ensure nothing gets missed in production pressure. Pre-installation photos document existing conditions for warranty protection. In-progress inspections verify compliance with specifications before covering work. Water testing confirms leak resistance before crews leave sites. Thermal imaging validates insulation installation completeness. The storm preparedness protocols ensure installations withstand extreme weather from day one.
Repair Expertise and Honest Recommendations
Roe Roofing’s repair specialists possess diagnostic skills that accurately identify problems and viable solutions, preventing customers from wasting money on futile repairs. The company’s honest assessment approach sometimes recommends replacement when repairs won’t provide lasting value, even though repairs generate immediate revenue. This integrity builds trust while ensuring customers make informed decisions aligned with their long-term interests.
The repair process begins with comprehensive evaluation using moisture meters, thermal cameras, and water testing to identify all issues, not just obvious symptoms. This thorough diagnosis reveals whether problems stem from installation defects, component failures, or design limitations that repairs cannot address. Detailed reports with photographic documentation provide transparency about conditions and recommendations.
When repairs prove viable, Roe Roofing employs techniques that address root causes rather than symptoms. Condensation problems receive ventilation improvements, not just surface cleaning. Flashing leaks get complete reconstruction, not sealant bandages. Operating mechanism failures trigger investigation of water infiltration causing corrosion. This systematic approach achieves lasting repairs when possible while identifying situations requiring replacement.
Long-Term Support and Maintenance Programs
Roe Roofing’s relationship with skylight customers extends beyond installation through comprehensive maintenance programs that protect investments and prevent problems. The company’s scheduled inspection services identify developing issues before they become expensive failures. These programs pay for themselves through prevented damage and extended skylight lifespan.
The maintenance protocol addresses all aspects of skylight performance. Cleaning using manufacturer-approved methods maintains light transmission and appearance. Seal inspection identifies deterioration requiring attention. Flashing evaluation catches separation or corrosion early. Operating mechanism lubrication prevents premature wear. Documentation maintains warranty compliance while providing repair history for future reference.
Educational support helps homeowners understand their skylights and recognize warning signs requiring professional attention. Seasonal newsletters provide maintenance reminders and weather preparation tips. Online resources explain common issues and solutions. Direct access to technical experts answers questions without sales pressure. This ongoing support ensures skylights deliver expected benefits throughout their service life.
Quality skylights properly installed last 20-25 years in Edmonton’s challenging climate, though actual lifespan varies significantly based on orientation, maintenance, and initial quality, with north-facing units lasting longest due to reduced thermal stress and UV exposure. Budget skylights with aluminum frames and double-pane glass typically fail within 10-15 years as seals deteriorate and frames corrode, while premium units with vinyl or fiberglass frames and triple-pane glass can exceed 30 years with proper maintenance. The weather impact studies show Edmonton’s extreme temperature swings accelerate deterioration by 30% compared to moderate climates, making quality and installation more critical than manufacturer warranties suggest.
Persistent condensation between glass panes indicates seal failure requiring replacement since repairs provide only temporary improvement, while frame condensation might resolve with improved ventilation or interior humidity control. Water stains around skylights demand investigation to determine whether leaks originate from flashing failures (repairable) or frame deterioration (replacement needed), with active moisture confirmed using meters providing definitive answers. Operating difficulties in venting skylights suggest mechanism wear that’s repairable if parts remain available, but obsolete models require replacement, while visible light transmission below 50% of original, extensive frame corrosion, or cracks in glass mandate immediate replacement for safety and performance.
Skylights impact energy consumption both positively and negatively depending on selection, installation, and management, with north-facing units providing net energy savings through reduced lighting needs without significant thermal penalty. South-facing skylights can provide beneficial winter heat gain that reduces heating costs by 5-10%, but require external shading or dynamic glazing to prevent summer overheating that increases cooling costs by 15-20%. The energy efficiency standards calculations show properly sized skylights (3-5% of floor area) with high-performance glazing (U-value under 1.5) and proper installation achieve net energy savings, while oversized or poor-quality units increase costs by $200-500 annually.
Converting fixed skylights to venting models requires evaluation of structural adequacy for heavier operating mechanisms, available clearance for opening sashes, and electrical access for powered units, with conversions typically costing 70% of complete replacement. The modification involves removing existing skylights, potentially enlarging openings for operating hardware, installing new flashing systems designed for venting units, and adding electrical circuits for motorized operation. Building permits are required for electrical work and structural modifications, while building codes mandate safety glazing and emergency release mechanisms for certain applications, making professional installation essential for code compliance and warranty validity.
DIY skylight installation remains possible for experienced individuals with construction knowledge, proper tools, and favorable weather windows, potentially saving $1,500-3,000 in labor costs, though mistakes can cost far more in repairs and damage. Professional installation provides structural assessment ensuring adequate support, proper flashing integration preventing leaks, code compliance avoiding legal issues, warranty protection requiring certified installation, and insurance coverage for any problems. The complexity of integrating multiple building systems—structure, roofing, insulation, vapor barriers, and finishes—creates numerous failure opportunities that professional experience avoids, making the investment worthwhile for most homeowners despite higher initial costs.